Learn how to harness and store solar energy to keep your greenhouse growing through the winter for free (or next to nothing).
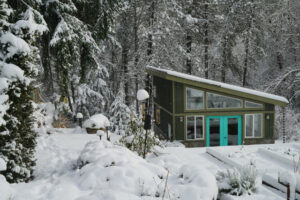
Greenhouses can be interesting environments to grow in. This is because standard greenhouse materials like glass and plastic (“glazing”) are extremely good at letting in light and heat in, and extremely good at letting heat out. With so much glazed surface area, greenhouses usually overheat during the day if uncontrolled. And because glass and plastic provide no insulation, at night they lose all that heat, causing them to freeze. For example, on one day in October in Boulder, Colorado a traditional full-polycarbonate greenhouse fluctuated from a high of 110 F to a low of 30 F in a single day. Plants, like people, do not like this.
The primary challenge with greenhouse growing is stabilizing these temperature swings. Conventionally, people do this by blasting energy via heating or cooling systems into the greenhouse. But the smarter, more sustainable way of creating a stable year-round greenhouse is to harness the excess solar energy coming in during the day, store it and use it at night. An additional approach is to add an efficient heater that uses cheap and renewable fuels. These strategies all take understanding and research, and have some upfront cost, but the pay-back in terms of year-round growing and long-term savings is well worth it.
Always Start with Good Greenhouse Design Principles
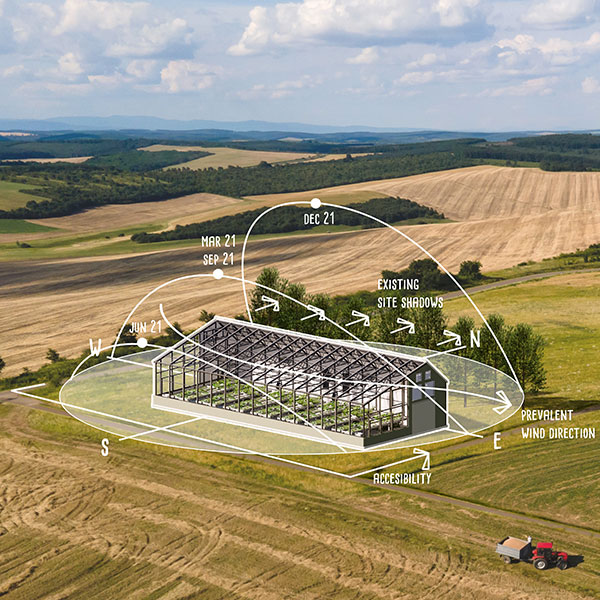
Remember, there’s no cheaper energy than the energy you don’t have to use, so if designing a new greenhouse, create an energy-efficient greenhouse that does not require much heating and cooling in the first place using passive solar greenhouse design. This means building an air-tight, insulated structure, using proper roofing materials, and orienting the greenhouse with the glazing facing South – where all our light in the Northern hemisphere comes from. If growing in an existing greenhouse, you can insulate your greenhouse and weather-strip air leaks among other things. Reducing your energy requirements by creating a thermally stable, energy-efficient greenhouse is always the first step.
Now we can explore additional options for keeping your greenhouse heating costs down.
1. Store Solar Energy in Thermal Mass
The easiest and most common way to even out the temperature of your greenhouse is to utilize thermal mass, also called a heat sink. Thermal mass is any material that stores thermal energy. Most materials do this to some extent, but some do it much better than others. Water for instance, holds about 2 times as much heat as concrete, and about 4 times as much as soil.
Incorporating mass does two things. First, it absorbs excess energy during the day, creating a cooling effect. When the temperature drops at night, it starts releasing that energy, thereby ‘heating’ the greenhouse. Note: though I say ‘cooling and heating’, the thermal mass is not actually providing the energy, it’s simply storing it and releasing it later, like a battery. The size of the battery (or how much energy you can store) depends on the heat capacity of the material and how much mass you have. Below is a quick comparison of a few different sources of thermal mass and their heat capacities.
Specific Heat Capacity by Volume J/(cm3*K)
- Air: 0.001
- Water at 77F: 4.18
- Concrete: 2.11
- Wet Soil: 1.28
- Dry Soil: 0.88
How-to Use Thermal Mass
The most common way to use thermal mass is water barrels, because it has such a high heat capacity. By stacking several 55 gallon drums of water in a greenhouse, the grower can incorporate a lot of thermal mass. Barrels should be stacked where they are in direct sunlight, often on a North wall. Since plants will be warmer around the water barrels, put more tender plants – like seeding trays or warm weather crops – on or near the barrels. If designing an aquaponics greenhouse, the fish tanks have the nice benefit of doubling as thermal mass. Other variations include building concrete or stone into the greenhouse – such as using a concrete North wall or flagstone floor. Even the soil in raised beds will add thermal mass.
While the easiest to install, thermal mass can be slow to react. It takes longer to disseminate the heat throughout the greenhouse, limiting its effectiveness. But, given the low upfront cost, adding thermal mass to a greenhouse is a popular method for extending the growing season. It may not get you year-round growth of all things, but it can certainly take your greenhouse to the next level.
The Downside of Using Thermal Mass
Employing water barrels (or any amount of thermal mass that will create a noticeable change) will take up space in the greenhouse. This space can potentially encroach on any growing space. Depending on your growing goals, this may or may not be problematic.
2. Incorporate a Heat Exchanger
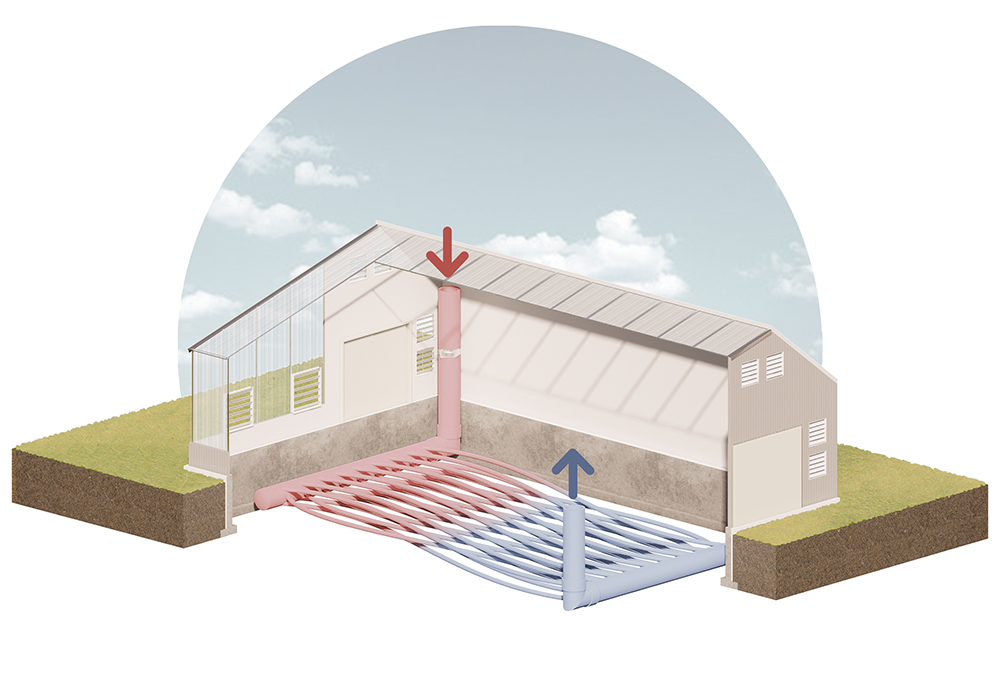
To go one step beyond standard thermal mass, you can incorporate a heat exchanger to circulate air through the source of mass. This is what we call the Ground to Air Heat Transfer (GAHT®) System, but it also goes by other names, like a Climate Battery.
There are many configurations, but the mechanism of energy transfer and storage is always the same. When the greenhouse heats up during the day, a fan pumps warm humid air from the interior of the greenhouse through a network of pipes buried up to 4’ underground (most systems consist of a couple layers of tubes buried at 4’ and 2’ below the surface). The drop in temperature forces the water vapor to condense, and in that process (called a phase change) energy is released. That energy is stored in the soil, causing the soil to heat up. Thus, the process creates a large mass of warm soil underneath the greenhouse year-round. At night, when the greenhouse drops in temperature, the fan kicks on again and extracts that heat from the soil.
A ground to air heat exchanger works very well for two reasons: First, the amount of available mass (the size of the battery as we mentioned before) is huge. For example, there are 768 cubic feet of soil beneath a 12’ x 16’ greenhouse, assuming a 4’ depth. If you lined the whole North wall of the same greenhouse with two rows of 55 gallon water barrels (16 barrels) they would have a total of 118 cubic feet of mass. That means, using the volumetric heat capacities in the table above, the underground heat exchanger has about twice the capacity as the water barrels. Moreover, because a ground to air heat exchanger connects to the deep earth and thus theoretically has an infinite capacity.
Secondly, because air is actively being pushed through the ‘battery’ it increases the rate of heat exchange. The hotter / cooler air is distributed around the greenhouse more evenly, preventing cold pockets. Additionally, using fans allows you to use the mass when you want: a thermostat kicks the fan on and off at certain set temperatures. I.e. the fan will start pumping warm air down into the soil when the greenhouse reaches a set temperature (say 80 F), and draw it back up when it has gone below 50 F. Thus, an underground heat exchanger gives you some control over thermal mass; it’s kind of like taking thermal mass and making it smarter.
Variations
The material of the battery can vary. Some people backfill the area underneath the greenhouse with gravel or stones instead of soil. If you already have a greenhouse, or can’t excavate on your site to do much ground work, you can create an alternative battery above ground. You can build an insulated mass of soil or other material, such as a box of river rocks in front of the greenhouse. The system works the same way, only the location of the thermal mass is different.
3. Use an Efficient Renewable-Powered Heater
The above systems show you how to harness the sun and store solar energy, which is a good first step to natural heating. If additional heating is needed, consider a highly efficient heating system that runs off of cheap and renewable fuel.
One of the common systems used in greenhouses is the rocket mass heater, a super efficient variation of a wood stove. Instead of just exhausting hot air straight out of a chimney like a standard wood stove does, the rocket mass heater first circulates the hot air through a mass of cob, brick or stone before it’s exhausted out. The air warms the mass which holds the heat and slowly radiates it back into the greenhouse over a long period of time, even after the stove is done burning. The rocket mass heater also uses a double combustion chamber, making it much more efficient than a standard wood stove – a couple hours of a burn with a small amount of wood can heat a greenhouse overnight. Most rocket mass heaters are DIY systems; you will have to investigate and design a system that fits for your greenhouse using the plethora of plans and explanations online.
Another common greenhouse system is the compost-pile heater, which relies on the magic of aerobic bacteria to break down organic material and give off waste heat. Like the underground heat-exchanger, a compost heater also relies on a heat exchanger: water is circulated through tubes running through a large compost pile. Because of the aerobic decomposition, a compost pile can maintain temperatures of 100-160 F. The heated water is then circulated through the greenhouse where it dispenses heat. Of all the systems, this one probably takes the most tinkering to get right and keep going. You must first build your compost pile with the right material and consistency to get it to a high temperature, and keep adding to it or re-building the pile as it decomposes. However, a large, properly constructed pile (see picture below) can keep a 1,000-2000 sq ft greenhouse heated for a winter. For these reasons, compost pile heaters are often best suited for larger greenhouses.
Summary
- First consider, what are your goals (how much space are you trying to heat, and to what degree)? Each system has a different capacity for heating.
- How much control do you want to have? (Some systems are active and some are passive. (i.e. You can crank up a rocket mass heater but there’s not much you can do to change water barrels).
- What constraints are you already working with? (I.e. difficult / rocky soils will rule out an underground heat-exchanger.) Think about how much floor space in the greenhouse you have for things like water barrels. And most importantly think about the time and labor involved in installing each system, as well as the on-going time / labor that it can take to run each system (i.e. an underground heat exchanger can be automated, whereas a rocket mass heater cannot be). Again, while you need to do some homework upfront, having a warm greenhouse churning out fresh food throughout the winter (and for free!) is the best payoff you can get.
If you don’t already have a greenhouse, and are looking to grow year-round, learn more about a Ceres greenhouse by contacting us here.